Ready-Made Knowledge Base Article Templates (Free Download + Examples)

A well-organized knowledge base isn’t just a nice-to-have — it’s one of the easiest ways to improve user experience and lighten the load on your support team.
Here's why: turns out 84% of customers try to solve support issues on their own before reaching out to a team. If you can provide clear, consistent articles in your help center, you will empower users to find answers on their own – saving your support team time and reducing repetitive support requests.
One of the proven ways to maintain consistency and quality with your knowledge base is to standardize articles with templates. Templates ensure every FAQ, how-to guide, troubleshooting tutorial, etc., follows best practices in structure and style, even with larger teams, making content easy to navigate and search. This will not only boosts your customer happiness metrics but it will also significantly reduce the number of repetitive support tickets – TSIA research suggests up to 60% of support tickets could be resolved through documentation (with over a third addressed by how-tos and guides).
In this post, we’ll break down the four article types every help center needs — complete with free HTML templates and examples you can download and make your own for any SaaS, e-commerce or other knowledge base:
- FAQ Articles
- How-to Guides
- Troubleshooting Guides
- Onboarding (Getting Started) Articles
Let’s dive in 👇
Insider Tip: Using a tool like HelpCenter.io makes this even easier, with features for template editing, rich media, and dynamic FAQ management, as you’ll see below.
FAQ Article Template
FAQ articles (Frequently Asked Questions) address common questions and answers in a concise, accessible format. You could have a single FAQ resolving specific question, an FAQ section revolving around a specific topic, or a complete page listing many Q&As.
The end goal of the FAQs is to help users quickly find answers to frequent queries – for example, an e-commerce FAQ might cover “What is your return policy?” or “How long does shipping take?” so the user will not have to contact support for an answer that would be the same regardless of how many people ask.
If you are unsure where to get started, FAQs could be a great starting point of your self-service help strategy. FAQ content could be easily extracted by going through your support tickets. Simply look for the most frequently asked questions in your inbox or ticketing platform and apply the FAQ template.
Pro Tip: You can speed things up with a little help from generative AI 🪄. Paste your support ticket content (question and answer) into ChatGPT along with your FAQ template and let the magic happen. It’s a quick way to draft clean, consistent answers without reinventing the wheel every time.
Here’s an exact prompt you can try:
Prompt to use in ChatGPT:
"You're helping me generate an HTML FAQ section. For each question and answer pair I give you, please return the result as a complete HTML<div>block like this:
<add-the-HTML-FAQ-template here>
Question: [Paste support ticket question here]
Answer: [Paste support team’s answer here]
Return only the HTML block with the filled-in content. No extra explanation."
Best Practices for FAQ Articles
- Use real questions as titles: Frame each FAQ title as an actual question a user would ask, using natural language. For instance: instead of a generic title “Return Policy,” use “What is your return policy?” This aligns with the way customers think and search. Always prefer the customer’s phrasing over internal jargon – e.g. if users ask “How do I upload my ID document?” but the product button says “Provide ID,” still title the article “How do I upload my ID document?” and clarify the wording inside.
- Answer directly and briefly: Start each FAQ answer with a direct, succinct response. If the question is yes/no or requires a one-sentence answer, say that upfront. You can then elaborate with more detail after the brief answer. This structure gives immediate gratification to scanning readers, with additional context if needed.
- Organize for scanning: If your FAQ page contains multiple Q&As, format them in a clear list or accordion style (question as a header, answer as collapsible content). Use bold or styling to make questions stand out. Group related questions under subheadings if the list is long (e.g. “Shipping FAQs”, “Account FAQs”).
- Include relevant links: For questions that have deeper documentation or related topics, include a link in the answer to more detailed articles. For example, an FAQ answer about password reset can link to the full “How to reset your password” guide. This helps users who need more than a brief answer.
- Keep language simple: FAQs are often entry points for all users (including non-technical). Write in a friendly, jargon-free tone. Imagine the user is asking the question in person; answer as you would explain to them directly.
💡 Insider Tip: Managing lots of FAQs can get cumbersome. Consider using a centralized place for all your content and organizing it into dynamic FAQ sections for easier updates. For instance, HelpCenter.io offers Dynamic Embeddable FAQ Sections that let you maintain questions in one place and display them anywhere - on your site, in your mobile app – no need to hard-code new answers each time. This keeps your FAQ content consistent and up-to-date across your product pages.
HTML Template: FAQ Article
Below is a simple HTML template for a FAQ article/page. It’s structured as a list of questions and answers. You can download this template and adjust the styling to match your site. Each question-answer pair is wrapped in a section for easy styling or scripting (for example, you might add JavaScript to toggle answer visibility on question click):
*👉 Download: FAQ Article HTML Template (Click to open the example template file and save the page as HTML.)
Feel free to modify the structure – for instance, you might use <details>/<summary> tags for a built-in accordion effect in modern browsers. The above template provides a baseline that you can enhance with CSS and JavaScript according to your needs.
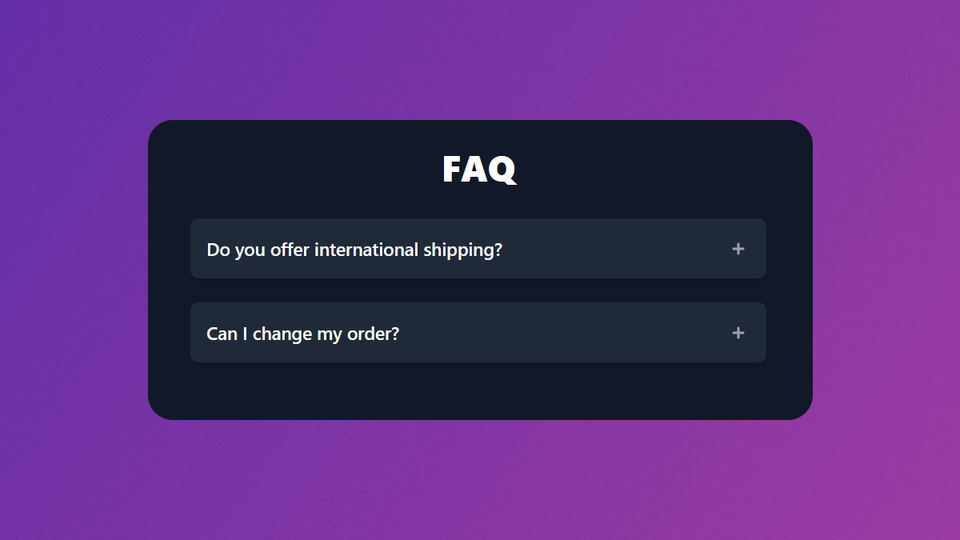
Styled FAQ Section using the above template
(In the image above, you can see an FAQ section with two questions. This is using an accordion style: the question “What is your return policy?” is shown, and the answer is revealed below it. Clear headings and a clean layout make it easy to scan. Some related articles could also be presented at the end.)
You can find some good templates for the looks of your FAQs in our previous blog post here.
How-to Guide Template
How-to guides are the workhorses of any knowledge base. These articles provide step-by-step instructions to help users accomplish a specific task or use a particular feature.
For SaaS products, how-to articles might include guides like “How to integrate our app with Slack” or “How to create an invoice in [Product].” An example in e-commerce for a how-to could be “How to track your order status” or any procedural walkthrough. A well-written how-to guide enables users to self-serve for both simple and complex tasks, reducing the need to reach out for help.
Best Practices for How-to Guides
- Begin with an action-oriented title: A how-to article’s title should clearly state the action or task, usually starting with a verb. For example, “How to change your password” or “Create an Invoice in Xero.” Titles that start with the task (and a verb) are more helpful than generic ones. Users typically prefer seeing “View Your Purchase History” over a vague “Purchase History” title. This way, users immediately know the article will teach them how to do something.
- Provide a brief overview: After the title, include one or two sentences summarizing what the guide covers and the expected outcome. For instance: “Follow these steps to reset your account password. By the end, you’ll regain access to your account even if you’ve forgotten your credentials.” This sets expectations and highlights the benefit or result of completing the how-to.
- Use numbered step-by-step instructions: Structure the main content as a sequence of steps (Step 1, Step 2, Step 3, etc.) in the order the user must perform them. Each step should be a single, clear instruction. Start each step with an imperative verb (click, select, enter, etc.), and keep instructions concise. If a step is complex, break it into sub-steps or bullet points.
- Include screenshots or visual aids: Whenever possible, add screenshots or images for each step (or at least the tricky steps). Visuals provide confirmation that the user is doing it right. For example, after describing a button to click, show an image of that button on the interface. Many great how-to articles have each explanatory paragraph followed by a screenshot of the application at that step. This greatly enhances clarity and user confidence. Ensure your images are clear, cropped to the relevant area, and labeled if necessary (with arrows or highlights).
- Anticipate common issues: If there are variations or common mistakes in the process, call them out. For example, “If you don’t see the Settings menu, make sure you’re logged in as an admin.” You might use a note or tip box for these. (In HelpCenter.io’s editor, you can insert callout blocks for warnings, tips, etc., to highlight such information)
- Link to related guides: At the end or where relevant, link to other knowledge base articles. For instance, a guide on “Import data from CSV” could link to “How to format your CSV file” or “Troubleshooting CSV import errors.” This helps the user if they need additional info, and keeps them in self-service mode.
💡 Insider Tip: Make use of a knowledge base tool’s rich media support to enhance your how-to guides. On a platform like HelpCenter.io, you can easily embed images, videos, or even GIFs within steps. Rich media can illustrate complex steps (like filling out a form or configuring a setting) much better than text alone. Also, take advantage of features like internal linking – HelpCenter.io’s editor lets you quickly link to other articles in your KB without leaving the editor.
HTML Template: How-to Guide
Here’s a basic HTML template for a how-to article. It outlines a title, summary, step list, and an optional section for additional links or FAQs. This template can be a starting point for writing any procedural guide:
*👉 Download: How-to Guide HTML Template *
You can enrich this template by inserting images after each list item (step). For instance, you might add an <img src="step1.png" alt="Screenshot of Step 1"> inside the <li> after the step description. Ensure to keep images responsive if your help center is viewed on mobile. A good practice is to annotate screenshots with highlights or arrows to draw attention to what the user needs to do in that step.
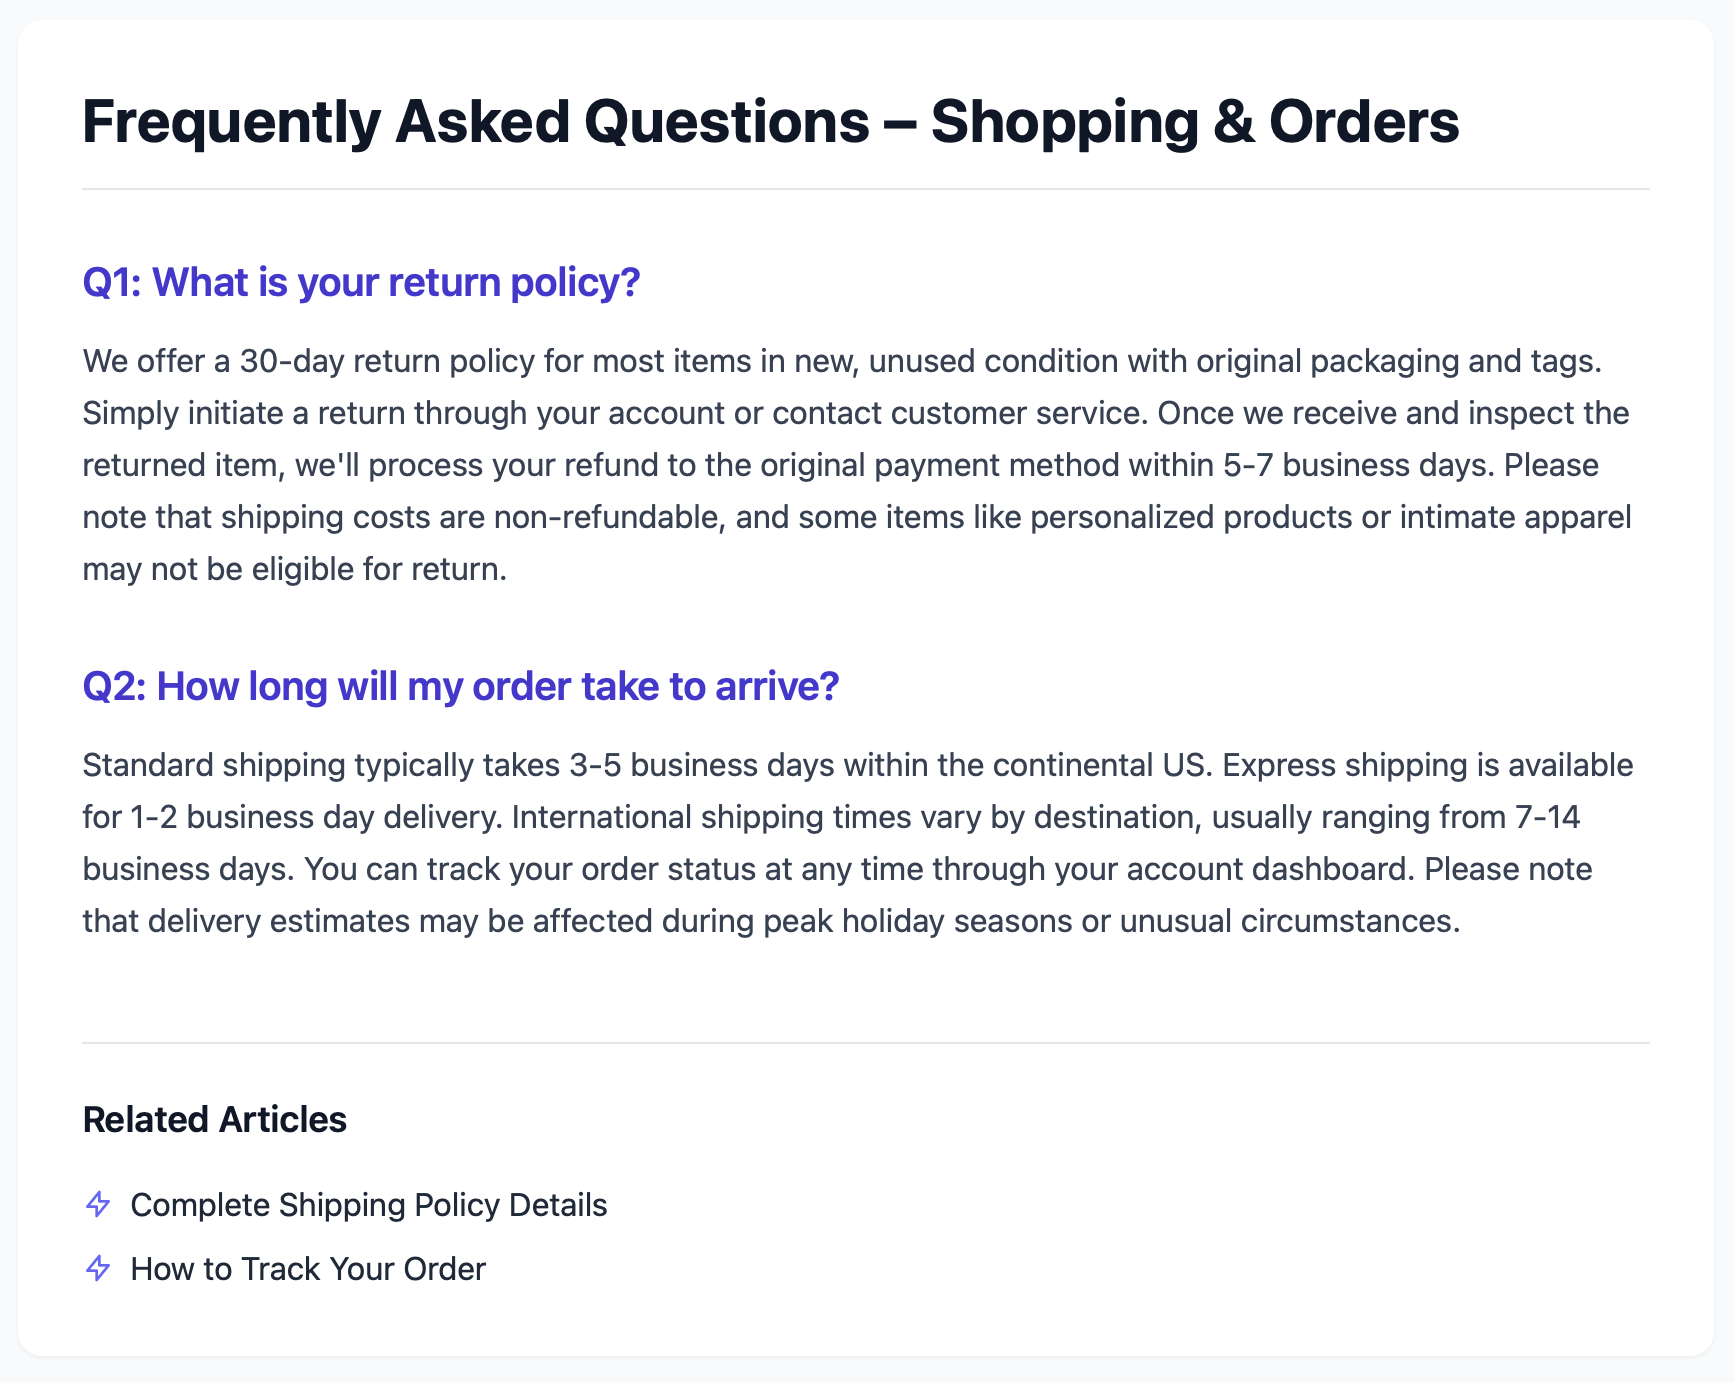
Example How-to Guide
In a live knowledge base, this would be visually presented in a similar way with clear numbering and images, making it easy for users to follow along and get to a successful resolution.
Troubleshooting Guide Template
A troubleshooting guide article helps users diagnose and fix a problem or error on their own. These articles are typically written for common issues or errors – for example, “Troubleshooting login issues,” “Error 5003: How to resolve connection error,” or “My payment was declined – what to do.”
For SaaS products and web apps, troubleshooting guides often address error messages, configuration problems, or frequently asked “Why isn’t X working?” questions. For e-commerce, it could be topics like “I didn’t receive an order confirmation email – steps to take.” By providing systematic solutions, troubleshooting articles let users resolve issues without opening a support ticket.
Best Practices for Troubleshooting Articles
- Clearly identify the problem in the title: The title should mention the specific issue and possibly that it’s a fix guide. For instance, “Troubleshooting: Unable to Login” or “How to Fix Error 105 (Payment Failed).” Including words like “Troubleshooting,” “Error,” “Fix,” or “Solution” signals that the article is meant to resolve a problem. It also helps users search and find the exact error by code or description.
- Describe the symptoms and cause briefly: Begin the article with a short summary that explains why or when the problem happens and what it looks like. E.g., “When trying to login, you might see a ‘Invalid password’ error even with the correct password. This usually happens after multiple failed attempts or browser cache issues.” This validates to readers that they’re looking at the right article for their problem. If the cause isn’t known or important for the user, you can emphasize the solution in the summary instead (“This guide will help you regain access to your account...”).
- Offer step-by-step solutions: Just like how-to guides, list the steps or methods to resolve the issue, in the order of likelihood or simplicity. If there are multiple ways to fix it, you can enumerate Method 1, Method 2, etc. For example: Method 1 – check your internet connection; Method 2 – clear cache; Method 3 – reset password. For each solution, provide the steps to do it. Keep instructions clear and numbered. Many troubleshooting articles follow a format: “Cause: … Solution: …” which you can use for clarity, especially if the article addresses a single known issue.
- Explain why when necessary: While keeping focus on the fix, it’s helpful to briefly note why something might solve the problem. For instance, “Clearing the cache removes outdated login credentials that might be causing the error.” This helps users understand the rationale and may increase trust in the solution.
- Use visual indicators: If the issue involves an error message or something on-screen, include an image of it. For example, show a screenshot of the error dialog or red warning banner that the user sees. Then maybe show screenshots of the solution steps (like where to click). Visuals in troubleshooting guides reassure users they are following along correctly, and are especially useful when the fix is technical. “Use screenshots amply; users appreciate visual confirmation that they correctly followed the steps.”
- Preventive or next steps: At the end, it’s good to add notes on how to prevent the issue in the future (if applicable) or what to do if the troubleshooting fails. For example, “If none of these solutions work, please contact support with the error code displayed.” or “To avoid this issue, ensure you update the app to the latest version regularly.” Also link to any FAQs or reference docs related to the issue (perhaps a “Known Issues” page or similar)
💡 Insider Tip: Long troubleshooting articles can benefit from a table of contents at the top, especially if you cover multiple sub-issues or methods. HelpCenter.io can automatically generate a table of contents for lengthy articles with multiple headings. Also, leverage callout boxes for different outcomes: a green “success” box to describe a solution result, or an orange “warning” box to caution about potential data loss during a fix (for example, before instructing a factory reset). Rich content editors like in HelpCenter.io support these callouts and formatting options out-of-the-box.
HTML Template: Troubleshooting Guide
Below is an HTML template structure for a troubleshooting article. It’s designed to outline the problem, possible causes, and solutions in an organized way:
*👉 Download: Troubleshooting Guide HTML Template *
This template is a starting point. You can adapt it to the nature of the problem. For instance, if you prefer a Q&A style for troubleshooting, you might format it as “Q: Why can’t I log in? A: Because of XYZ. Q: How do I fix it? A: Follow these steps…”. The given structure is more step-by-step. Also, consider adding an <ul> list of possible causes if multiple, before diving into solutions.
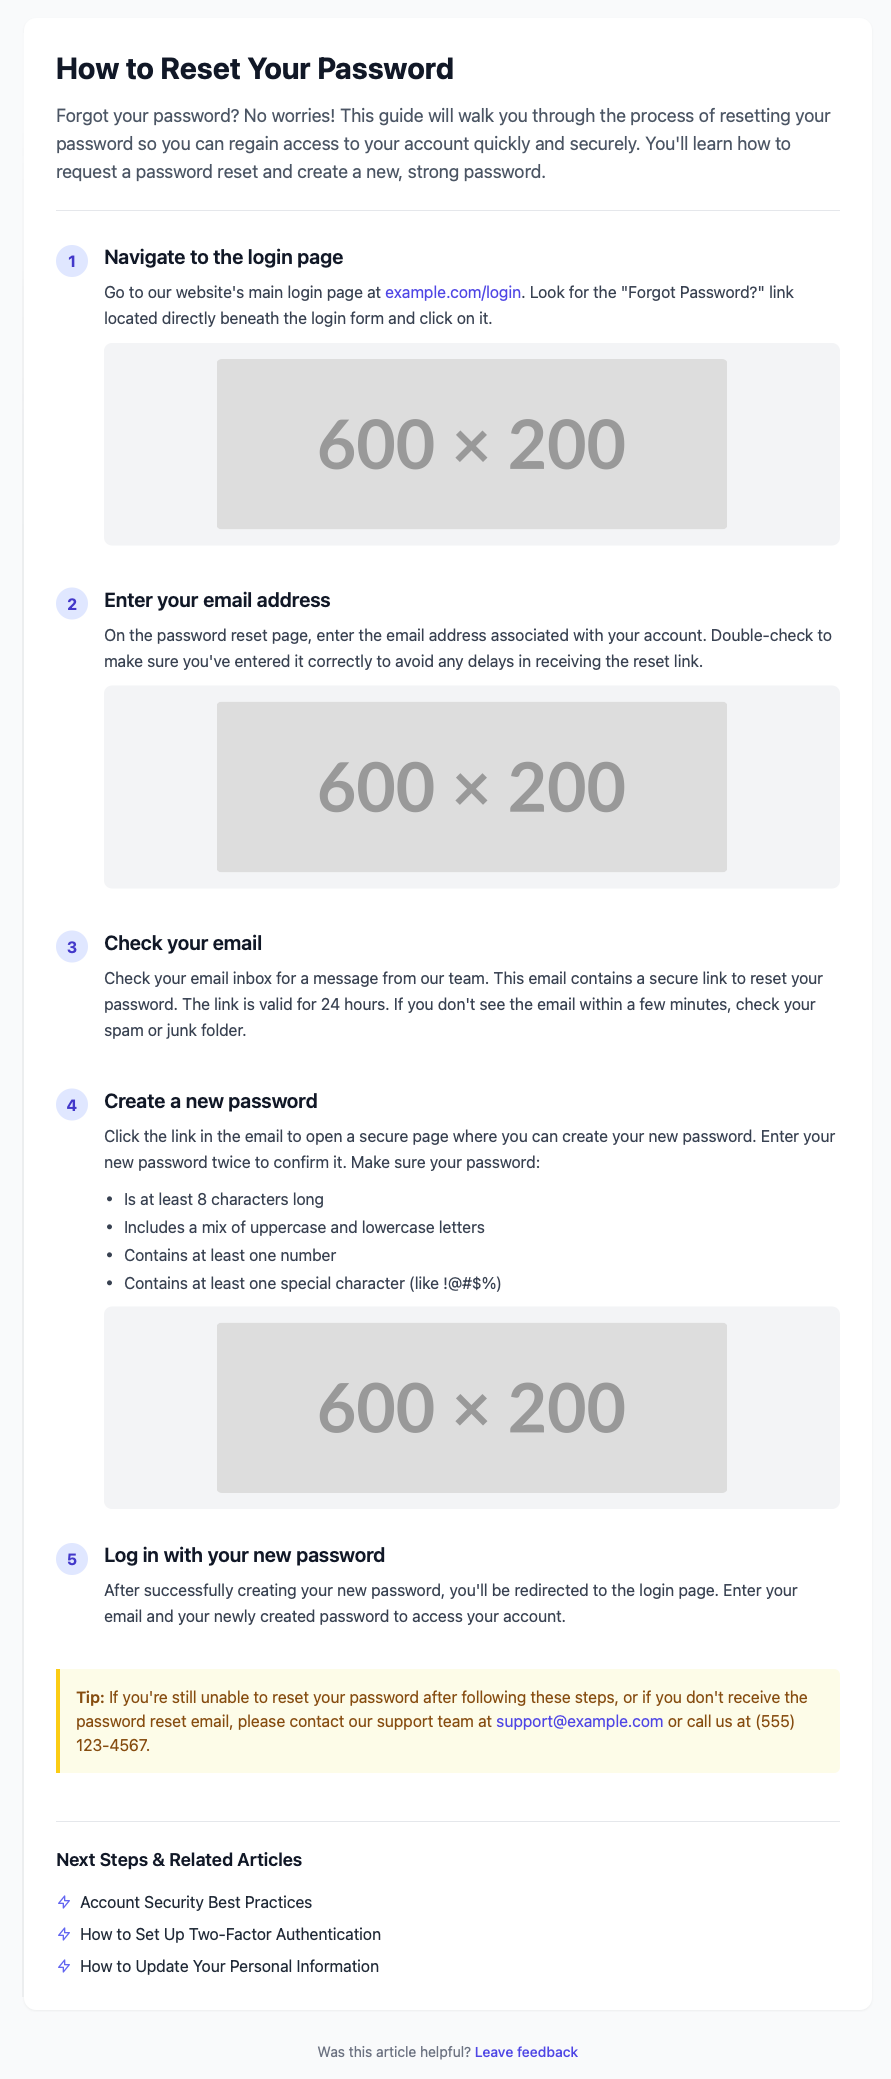
Example Troubleshooting Guide
The example above is formatted with clear headings “Cause” and “Solution” as in the template, and a list of steps to try. This structure ensures users can systematically work through the fixes, hopefully resolving the issue on their own.
Onboarding Article Template (Getting Started)
This one’s all about first impressions. Onboarding articles (often titled “Getting Started with X” or “Beginner’s Guide to Y”) welcome new users and show them how to get set up — from account creation to first success.
For SaaS businesses, this could be a product onboarding guide that helps a new customer set up their account, learn basic features, or complete an initial key action. In e-commerce, an onboarding article might be a “Guide to your first purchase” or “How to use your new [Product] for the first time.”
The purpose of onboarding content is to ensure a smooth first experience, helping users understand the product’s core value and accomplish the first steps needed to get going. These articles often combine elements of how-to guides and feature overviews in a friendly, approachable way.
Best Practices for Onboarding Articles
- “Getting Started” title: Make it immediately clear that this is a beginner-friendly guide. Use titles like “Getting Started with [Product],” “Beginner’s Guide: Using [Product],” or “First Steps in [Product].” This signals to new users that the article is tailored for them. It’s also good for SEO when users search “[Product] getting started.”
- Warm welcome and overview: Start with a welcoming tone – “Welcome to [Product]! We’re here to help you get up and running.” Then give a short overview of what the product is or its main benefits, and what the article will cover. For example: “In this guide, you’ll learn how to set up your account and perform your first [key action].” Emphasize how these steps will help the user achieve something valuable (for motivation).
- Assume low prior knowledge: Write as if the reader knows little to nothing about the product. Avoid heavy jargon, or if you must use terms, include brief definitions. An onboarding article might even have a small glossary for new users. (E.g., “Projects: containers for grouping your work. You’ll create one in Step 2.”) This ensures newbies don’t get lost on concepts.
- Highlight key features/setup steps: Often, onboarding involves a few critical steps: e.g., creating an account, configuring basic settings, completing a tutorial task, etc. Outline these in a logical order. Numbered steps work well here too (“Step 1: Do X, Step 2: Do Y…”), similar to a how-to, but with more explanation of each step’s importance. For each step, if applicable, mention why it’s important. “Invite your team members – this way you can collaborate and get value from Day 1.”
- Use images or video walkthroughs: New users appreciate visual guidance. Include screenshots of the sign-up page, the dashboard, or whatever part of the UI they’ll interact with first. If your team has an intro video or product tour, embed it or link to it. Onboarding is a great place for a short GIF or video clip showing the product in action (for example, a quick screen recording of creating your first project).
- Keep it friendly and encouraging: The tone should be positive and supportive. Phrases like “it’s easy to…” or “let’s do this!” (if it fits your brand voice) can set the user at ease. Remember, the user might be completely new and possibly intimidated by a new software – so walk them through with patience. Celebrate the outcome: “That’s it! You’ve created your first invoice. 🎉 Next, let’s send it to a customer…” A little encouragement can improve user onboarding experience.
- Link to deeper resources: After covering the basics, provide links to more advanced docs or the knowledge base categories for when they’re ready to explore further. For example, “Now that you’re set up, you might want to read our User Guide for a deeper dive into all features” or “Check out Top 10 Tips for New Users next.”
💡 Internal Tip: Onboarding often needs to be customized for different user segments (admins vs regular users, or Free vs Paid users). Keeping separate articles or sections for each can be helpful. Also, if you serve a global audience, consider translating your onboarding guide. With HelpCenter.io’s multi-language support, you can easily provide the same “Getting Started” article in multiple languages from one platform. This ensures every user, regardless of locale, can start off on the right foot. Additionally, you can use the template editor to match the onboarding article’s style with your brand, making new users feel at home with a consistent brand experience.
HTML Template: Onboarding Article
Below is an HTML template for a “getting started” style knowledge base article. It’s slightly more narrative, guiding the user through initial steps and introducing key features:
*👉 Download: Onboarding Article HTML Template *
This template can be adjusted based on your product’s onboarding flow. If your onboarding is very step-by-step (as above), use the structured steps. If it’s more of an overview of features, you could structure it by feature sections (e.g., Account Setup, Using the Dashboard, Next Steps instead of Step 1, 2, 3). The key is to keep it welcoming and easy to follow for a newcomer.
Example Preview: Onboarding Article
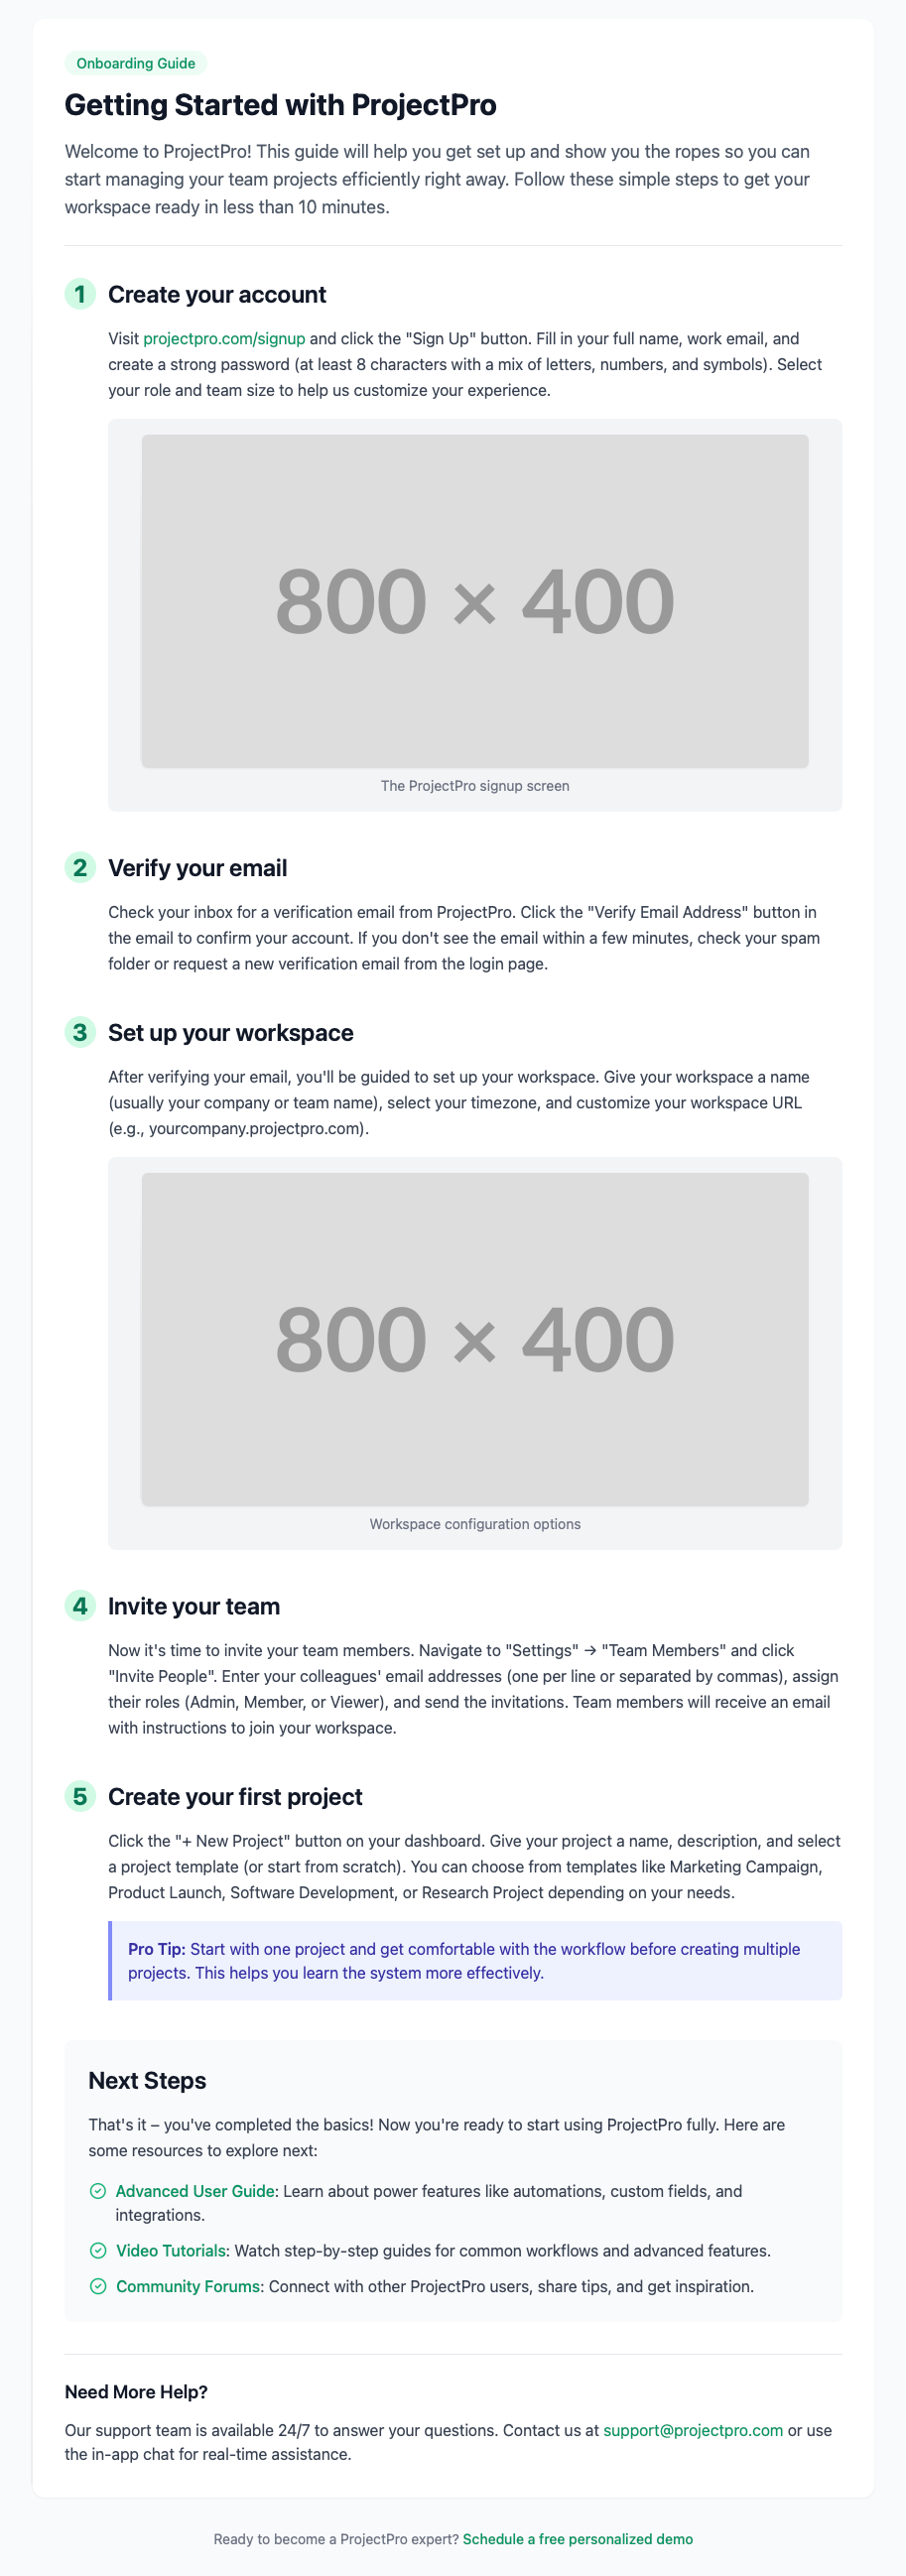
In practice, this onboarding article would be visually rich and broken into clear sections per step, as shown in the example above. The user reading it should feel guided as if someone is walking them through the setup.
You can find all of the template examples in our GitHub account here.
Conclusion & Next Steps
Building a robust knowledge base might seem daunting at first, but using these ready-made templates can jumpstart your process and ensure consistency from day one. By following the best practices and structures outlined above, you’ll create content that is easy for customers to navigate and understand – ultimately reducing support load and keeping customers happier. Remember, internet users come with an expectation of self-service; if your documentation is organized and accessible, they will use it. All four templates (FAQ, How-to, Troubleshooting, and Onboarding) are free to download and modify. We encourage you to tweak them to fit your product’s voice, style, and specific needs. For example, add more sections, change the wording, or integrate them with your site’s HTML/CSS framework.
If you’re using HelpCenter.io to power your knowledge base, you can create these templates as article templates and quickly apply them to any new article you are creating. The platform’s live preview and drag-and-drop editing features let you adapt your content without hassle. You’ll also benefit from built-in elements like search, feedback widgets, and analytics to improve your knowledge base over time.
By investing effort upfront in well-structured, well-written knowledge base articles, you’re investing in a better customer experience and a more scalable support strategy. Fewer repetitive questions will reach your support inbox because users will already have their answers at their fingertips. So go ahead – download these templates, customize them, and start filling them in with your product knowledge. Your future self (and your support team and customers) will thank you!
Lastly, keep your knowledge base fresh. Regularly update the articles as your product changes and grow the content based on real user questions and feedback. An up-to-date knowledge base with a solid foundation of templates will continuously deflect tickets and empower users long-term. Happy writing, and happy supporting!